Introduction to CloudGoat 2
Rhino Security Labs is happy to announce the release of CloudGoat 2, the next generation of our “vulnerable by design” AWS deployment tool.
Penetration testing in AWS is still very new. There is an absence of tools to aid in learning and practicing the wide spectrum of skills required to conduct a thorough AWS pentest. In other areas of pentesting, this isn’t a problem. For example, people interested in learning web application pentesting have many resources for directly learning and testing skills and techniques in a repeatable way. There are capture-the-flag competitions and vulnerable-by-design virtual machines or web applications that provide local sandboxed environments for learning. CloudGoat brings the same idea to the cloud and allows users to create intentionally vulnerable AWS environments based on vulnerabilities observed in the wild by Rhino Security Labs researchers.
You can find CloudGoat on our GitHub here.
New Features in CloudGoat 2
CloudGoat 2 extends and improves the functionality of the original CloudGoat in several ways. To begin with, the CloudGoat user interface has been vastly improved. Users now create or destroy infrastructure for scenarios from within a python script which supports help messages for all commands and arguments.
Scenarios
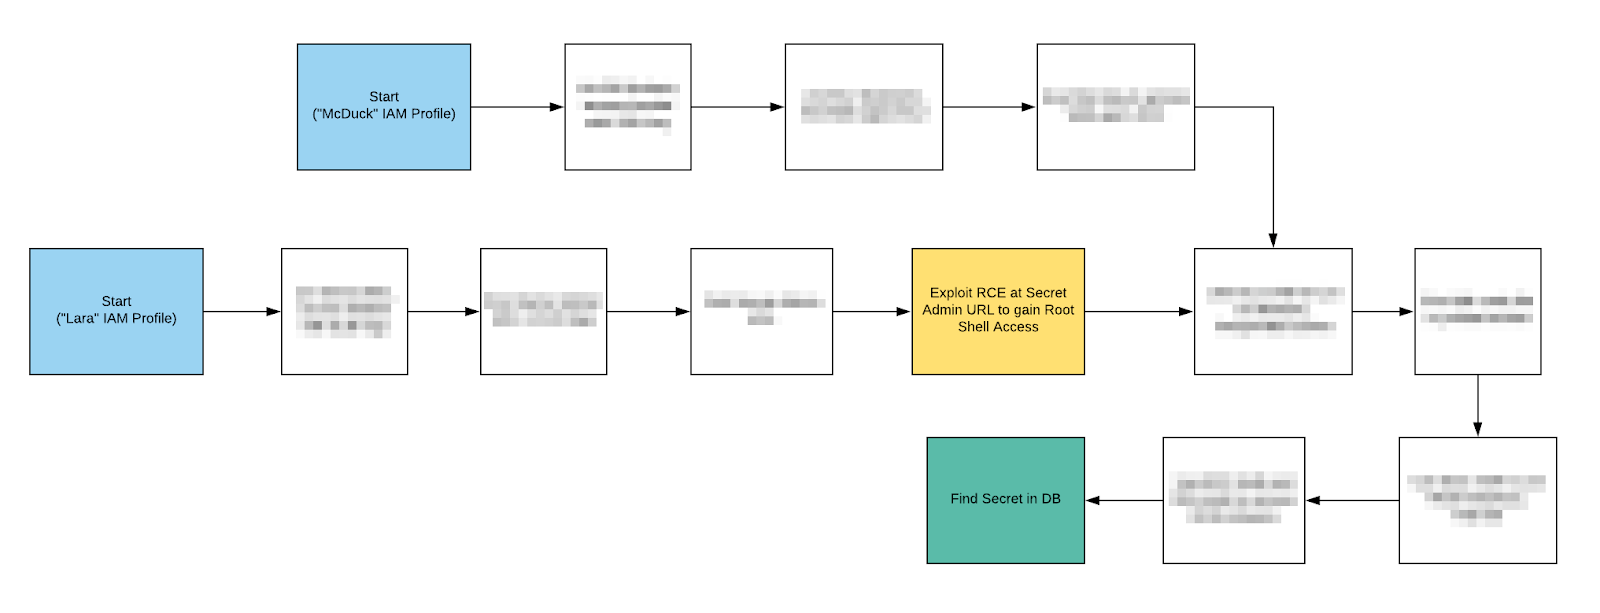
CloudGoat 2 also introduces “scenarios”. Scenarios are self-contained learning environments with clearly defined attack paths and goals. Each scenario is supported by documentation detailing the infrastructure created, attack paths present, and step-by-step walkthroughs. Pictured below is the slightly redacted rce_web_app attack path diagram showing users that multiple attack paths are possible and providing hints along the way.
The scenarios included at the launch are:
- rce_web_app – Find the secret endpoint and exploit a web app remote code execution vulnerability to gain root EC2 access inside a VPC.
- iam_privesc_by_attachment – Discover and attach existing instance profiles to elevate privileges.
- iam_privesc_by_rollback – Enumerate IAM policy versions and roll back to a previous version with higher privileges.
- codebuild_secrets – Explore CodeBuild and SSM to discover plaintext secrets in a secure database.
- ec2_ssrf – Find and exploit the EC2 metadata service to get keys using an SSRF vulnerability in a web app.
CloudGoat was created for the security community and we encourage involvement from everyone. All of the components of CloudGoat 2 are designed with expansion and community contributions in mind.
Getting Set Up with CloudGoat 2
To start using CloudGoat, you first need to log in to the AWS console (if you already have an account) or create an AWS Free Tier account and log in to the console. If you haven’t yet, make sure to enable MFA on your root account and delete any root access keys. To adhere to best practices, we are going to create an IAM user and attach the AWS Managed “AdministratorAccess” policy. It is very important that you do not use your root account to deploy CloudGoat.
Creating an IAM User
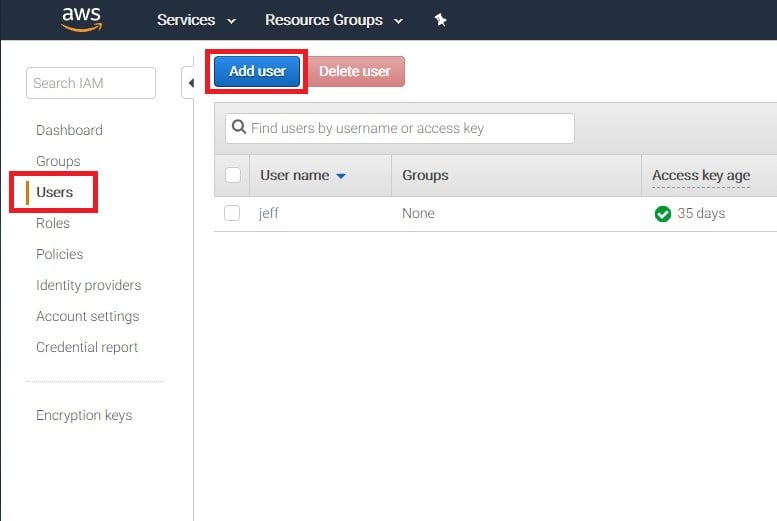
The next step in using CloudGoat is creating an IAM user. You will need to navigate to the IAM section of the AWS Console and select “Users” from the Left side menu then select “Add User”, as pictured below.
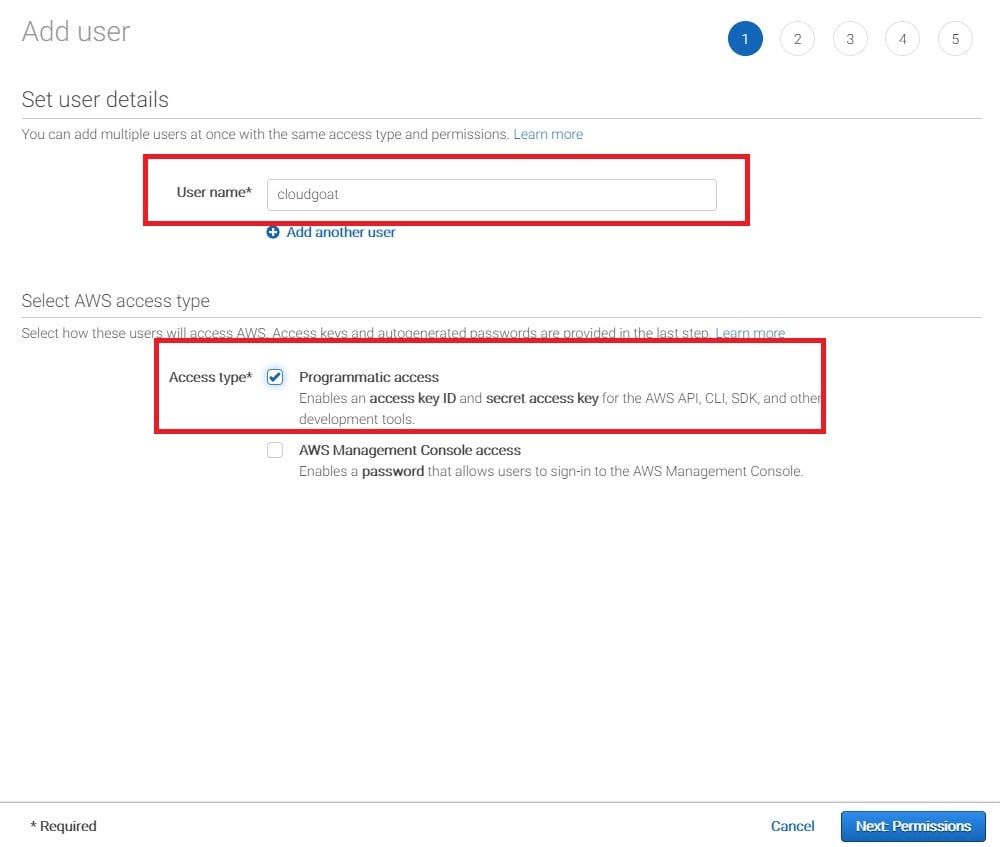
On the following screen, enter a username for the account and give the account programmatic access, which will generate keys for the user. We’ll be using these keys to configure a profile in the AWS command line interface. The image below shows the author creating a user named “cloudgoat” and giving the user programmatic access.
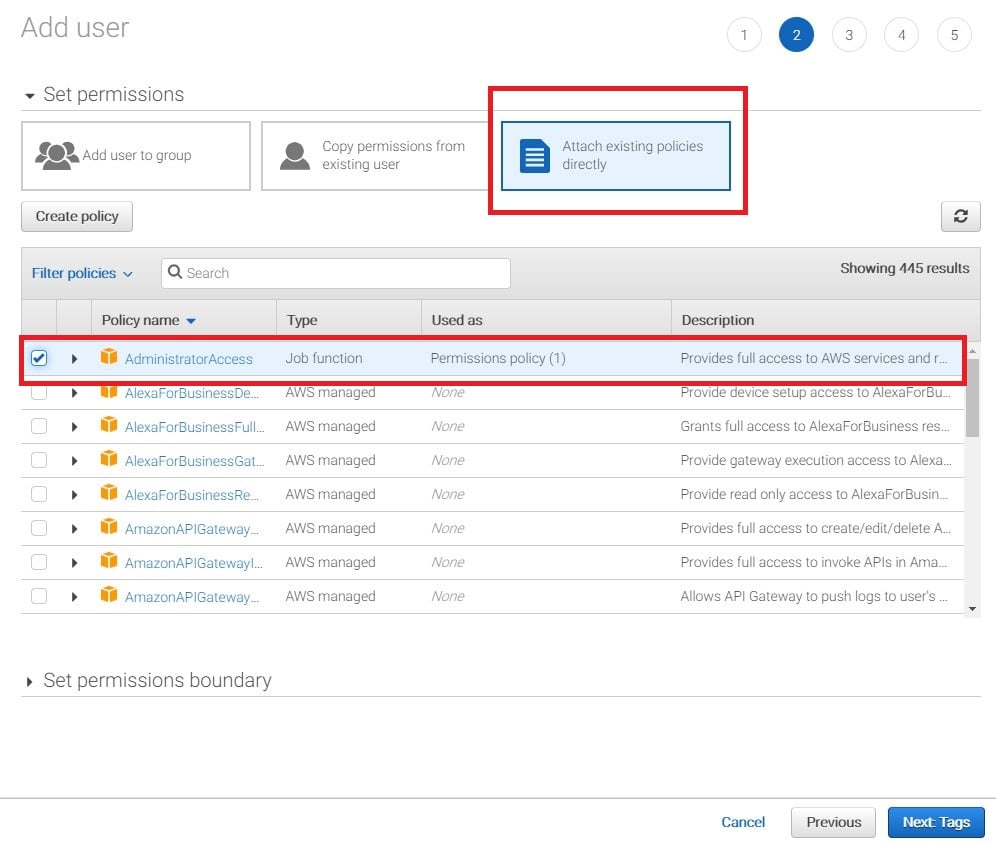
The next step is to attach an existing policy directly to the new user. Select “attach existing policies directly”, as shown in the screenshot below. CloudGoat requires administrative access so select the “AdministrativeAccess” policy that appears at the top of the list.
The subsequent screen is for assigning a Tag to the newly created user, but we won’t be using that feature in this walkthrough. Click “Next: Review”.
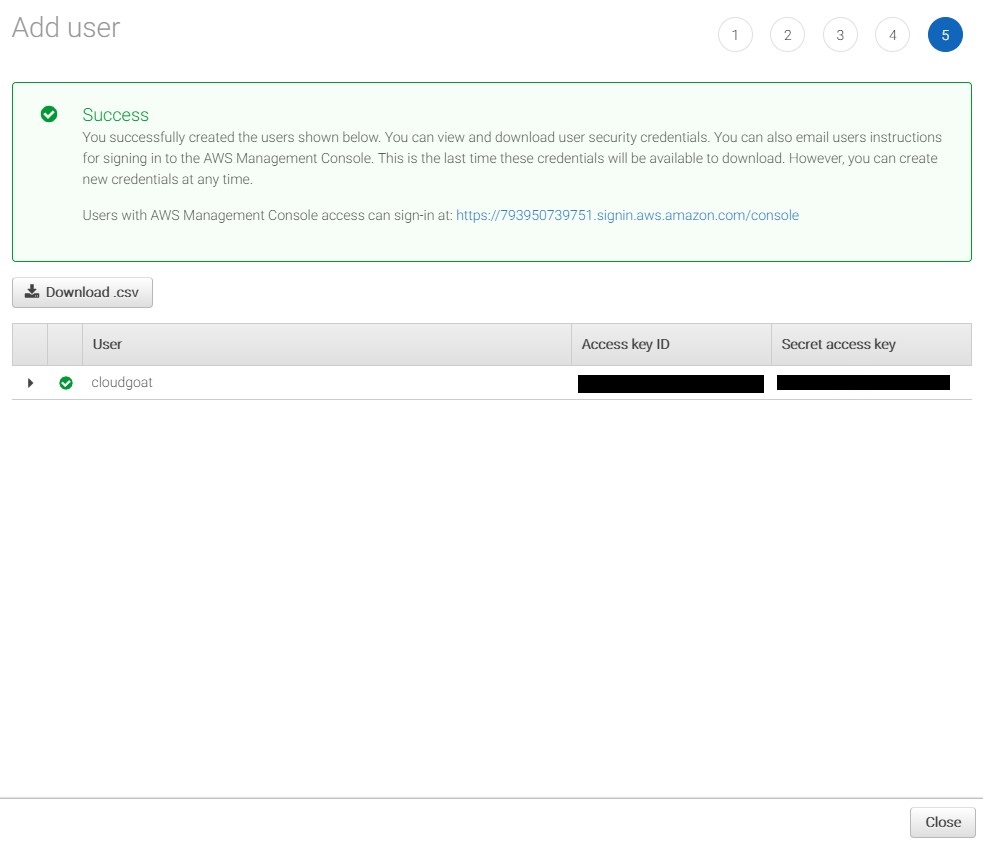
Review the information to ensure it’s correct then click the final “Create User” button. A “Success” message will be displayed and your AWS keys will be displayed. This is the only time you can retrieve the AWS Access Key and AWS Secret Key, so it’s important to save them. If they’re lost, you will need to generate a new set of keys. The screenshot below shows a successfully created user and the keys issued to that user, which are required to create a CloudGoat environment.
Configuring the AWS CLI
Next we need to configure a profile in the AWS command line interface. Run the following commands to install the AWS CLI and configure an AWS CLI profile. When prompted, enter the AWS Access Key and Secret Access Key generated in the previous step:
sudo apt-get install awscli
aws configure --profile cloudgoat
Now we are ready to create our first CloudGoat scenario!
Creating a Scenario
Because we are going to be creating intentionally vulnerable AWS environments, it’s important that they are only accessible to the intended users. CloudGoat uses a whitelist to restrict access to only allow connections from specific IP addresses or CIDR ranges. Run the following command and follow the prompts to whitelist your public IP address:
./cloudgoat.py config whitelist
The final step in setting up the scenario is to run the “create” command with the AWS CLI profile we set up, and specify which scenario we are creating. Multiple scenarios can be created within an AWS account, however the create commands must be run separately. Run the following command to create the CloudGoat rce_web_app scenario:
./cloudgoat.py create rce_web_app --profile cloudgoat
When the build completes, some information will be displayed to get you started. For the rce_web_app scenario, you are given two sets of keys. Create AWS CLI profiles for the given keys and remember to have fun! If you get stuck at any point, the CloudGoat GitHub has detailed walkthroughs and flow charts to help you learn.
Hint: A good first step is to see what resources you can access. Can you list EC2 instances? S3 buckets?
Other Resources
The following Rhino Security Labs blog posts should also be helpful:
AWS IAM Privilege Escalation – Methods and Mitigation
Pacu: The Open Source AWS Exploitation Framework
Using AWS Account ID’s for IAM User Enumeration
Unauthenticated AWS Role Enumeration (IAM Revisited)
Assume the Worst: Enumerating AWS Roles through ‘AssumeRole’
Conclusion
There are many resources for learning Web Application testing or binary exploitation, but there are still very few for learning AWS pentesting. CloudGoat exists to close that gap. There will be additional scenarios released periodically based on our research here at Rhino Security Labs. Also, keep your eyes peeled for official walkthroughs of each scenario.
CloudGoat can be found on our GitHub here.


